Introduction
Like all modern vehicles, a BMW is equipped with suspension components called stabilizer bars, also referred to as sway bars. There are two stabilizer bars on the vehicle, one for each “axle” (front and rear). They are designed to redistribute the weight of the vehicle in turns and can have far reaching effects on the vehicle's handling properties. My sport-package equipped 328is, for example, has slightly larger stabilizer bars on the front and rear of the vehicle to complement the factory lowering springs by reducing body roll.
Stabilizer bars accomplish their goal in part by tying the left and right wheels of a particular axle together. The physical connection at the end of each stabilizer bar is made through what is known as an “end link”. The end link can take many forms, but on the E36 BMW the front end links consist of a metal-sleeved rubber bushing on one end and a ball joint on the other, while the rear end links are simpler – a metal-sleeved rubber bushing on one end and a rubber bushing that is press fit over the end of the bar.
The ball joint on the front end links allows the flexibility required as the suspension geometry changes throughout its range of motion. The system is, after all, trying to tie something that resists motion (the bar, fixed to the frame) to something constantly in motion (the lower control arms...or strut in the case of the M3). Over time, the ball joints in these links can loosen up, the ball joint rubber boot can crack and release grease (or allow water in), and the rubber bushings on all the end links can become similarly compromised.
The effects of old end links are most notably felt in the front end of the vehicle. When the front end links loosen up, they tend to cause a general feeling of sloppiness in the steering and a momentary shimmy in the wheel as the vehicle traverses bumps during turns. Servicing the sway bars can be an effective and inexpensive way to eliminate this sloppiness. This is particularly important since problems with sway bars are all too often misdiagnosed as bad control arm bushings or faulty struts/shocks.
Notes and Warnings
We're working on critical suspension components here, so you just knew I'd have a laundry list of these. Bear with me.
- This article describes how I replaced serviced my sway bars with OE parts on my 1998 E36 328is equipped with sport package suspension. Any part numbers I mention here are specific to that vehicle. If you do not own this vehicle configuration, you will need to order different parts. Get the last seven digits of your VIN and talk to your dealer's parts department, or browse realoem.com for the appropriate part numbers.
- This is one of those jobs that makes me glad I bought torque wrenches with pivoting heads. If your torque wrenches don't sport pivoting heads, don't fret. You should still be able to do the job...it's just that it may take a bit longer as you will have to remove the wrench more often due to a lack of clearance to swing it.
- You should take this opportunity to replace all of the hardware and mounting flanges associated with the end links. The parts are inexpensive, and since they take quite a lot of abuse it's just safer to replace them in case any of the parts have become fatigued. Remember – the effects of metal fatigue are cumulative and you can't necessarily tell a part is fatigued by looking at it.
- While not strictly required, if you make the call to service one sway bar you should service the other to preserve the vehicle's original handling properties, as the bars are designed to work with each other. This is particularly important if you lack high performance driving experience or are uncomfortable with the vehicle near its limits.
- Danger: When the wheels are asymmetrically loaded (one up, one down) stabilizer bars exhibit the dangers associated with the stored energy of a compressed spring. Wheels must be at the same level (jacked or not) to unload the bar PRIOR to working on them. Do NOT jack only one wheel at a time or you are bound to injure yourself when the energy in the bar is violently released.
- Warning: Unless you really know what you're doing (i.e. you have an automotive or mechanical engineering background – and for the record, I don't), you should always use the BMW OE hardware, as the bolts must meet specific strength requirements and almost all of the nuts are the one-time-use self-locking type. Failure to use the correct hardware may result in damage to something or someone. Fortunately, the OE hardware is inexpensive.
- Warning: If you are installing aftermarket sway bars, follow the manufacturer's directions. They may very well be different than the process I describe here.
Prerequisites
- Equipment to jack up each axle of the vehicle (jack, 2 jackstands, wheel chocks)\
- Tools necessary to remove/replace the wheels (17mm deep socket, breaker bar, torque wrench)
- Torque wrench(es) capable of 31, 44 and 87 (+/- 7) ft*lbs. Pivoting heads will come in handy.
- 3/8” drive 6” fixed socket extension – used to torque the sway bar bushing mounts which are recessed up into the body somewhat. The torque involved is only 22 ft*lbs, so this is likely to be handled by a 3/8” drive torque wrench. I used my 6” wobble extension but that made things a bit more difficult. A fixed extension is recommended.
- Standard depth 6 or 12 point 13mm socket and combination wrenches
- Standard depth 6 or 12 point 16mm socket and combination wrenches
- Custom thin 16mm combination wrench (can be bought, but I made mine on the grinder)
- Parts including the end links, end link mounting flanges, all new hardware, and mounting bushings appropriate to the size of the sway bar. Check with your dealer's parts department, realoem.com or the BMW ETK software.
- A spray bottle of Spray 9 cleaner to serve as a temporary installation lubricant
Swaybar Service Highlights
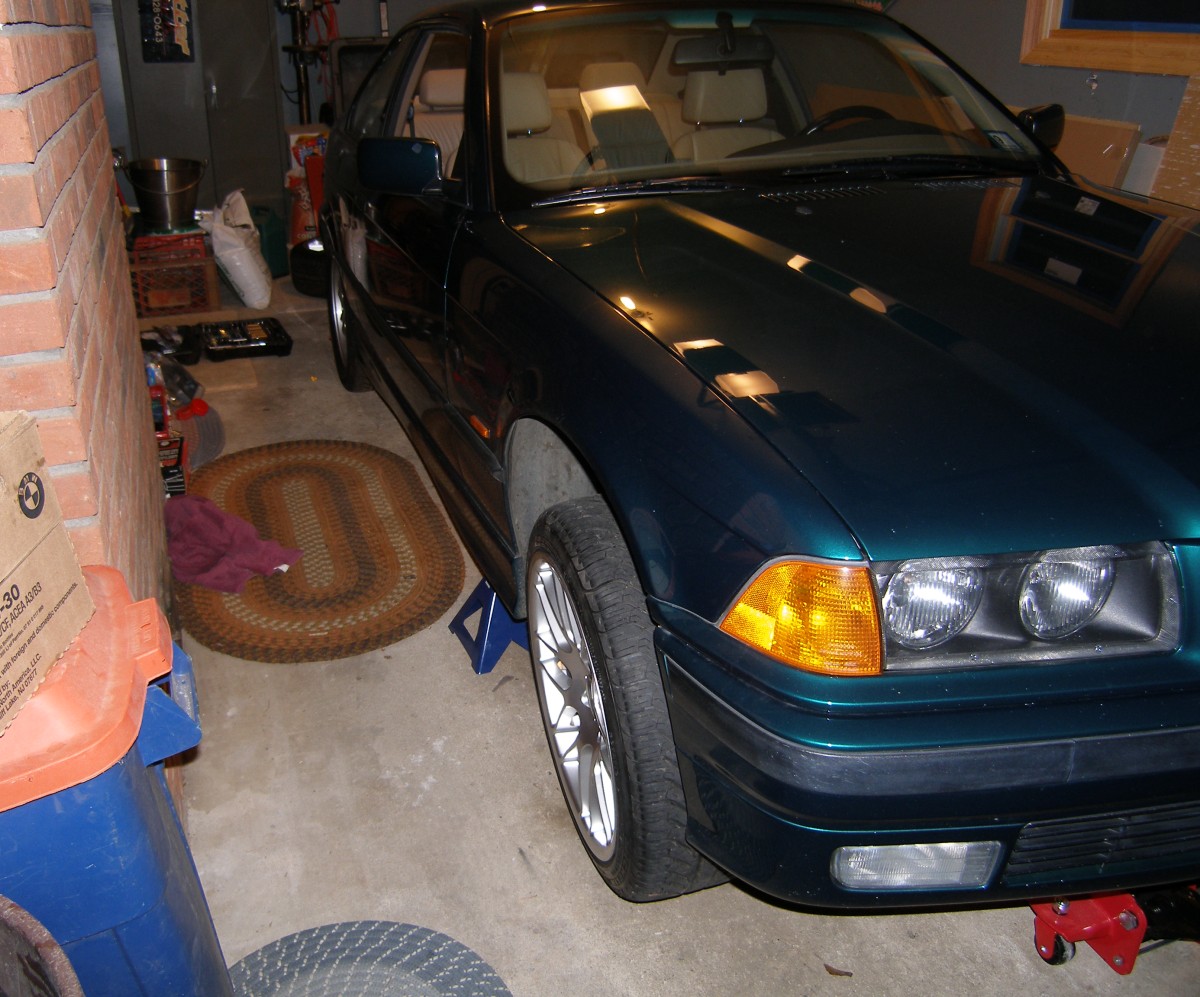
Fig. 1: Front End Jacked Up
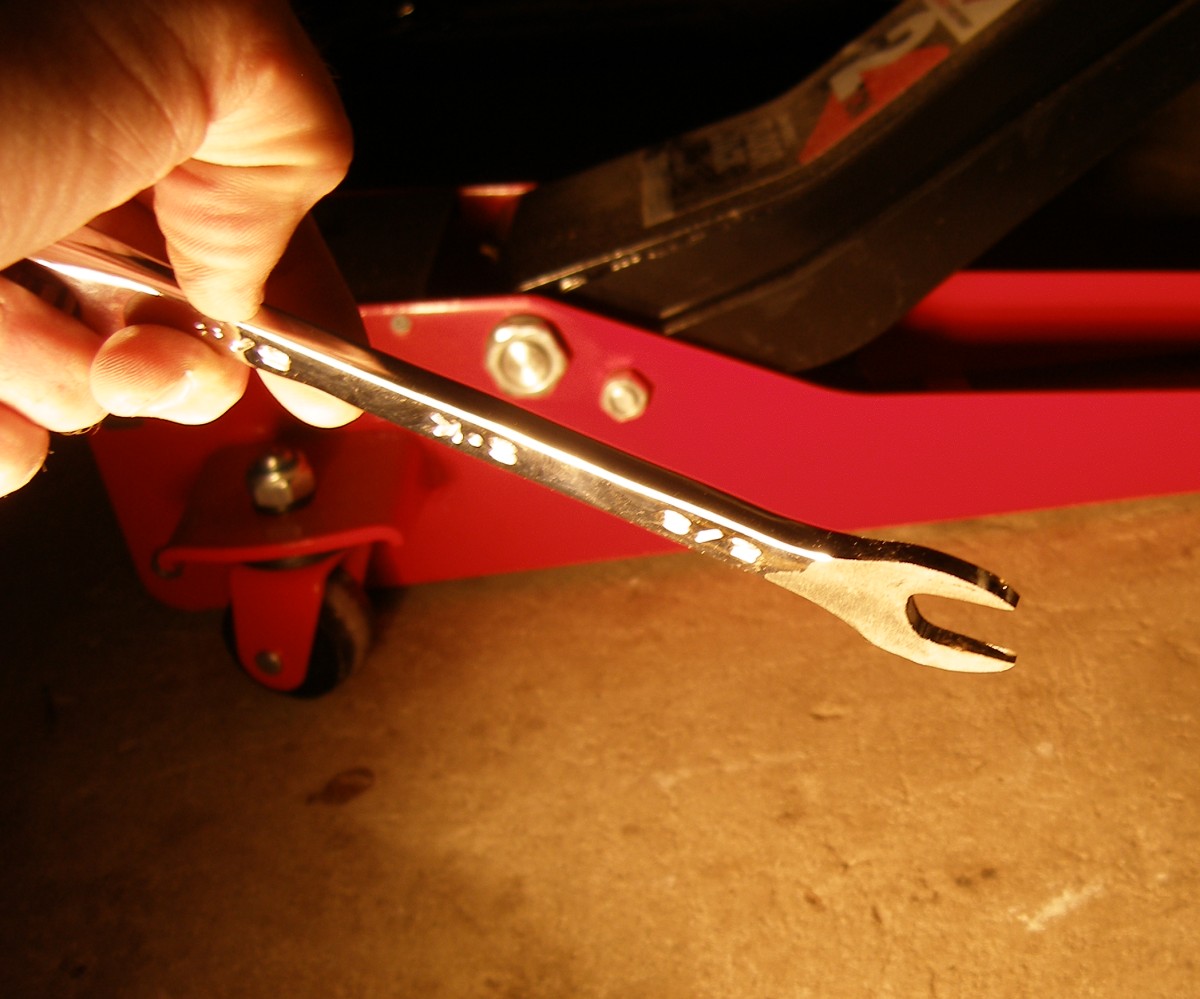
Fig. 2: Custom End Link Wrench
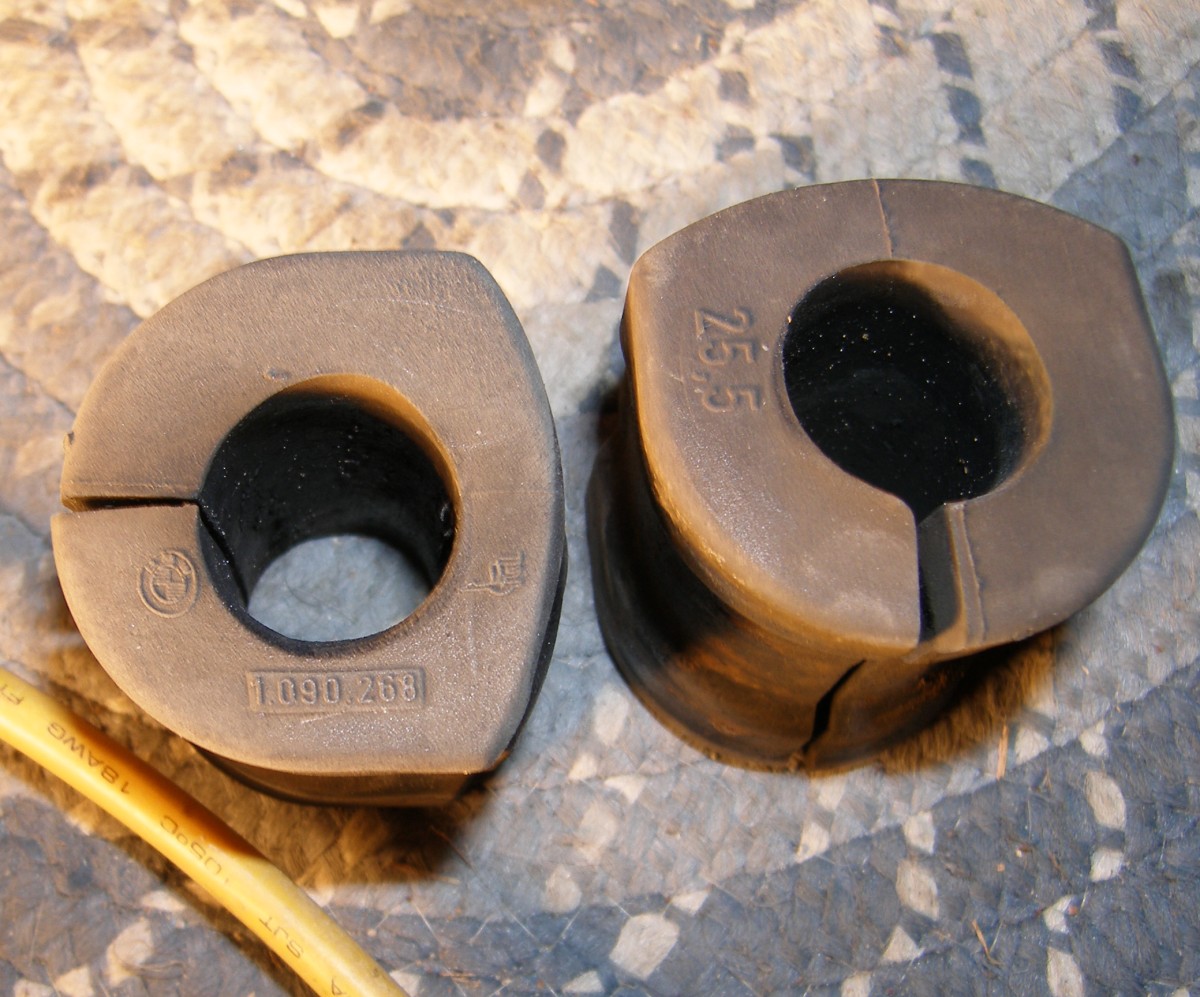
Fig. 3: Sport Package Swaybar Bushings

Fig. 4: Front End Link Installed
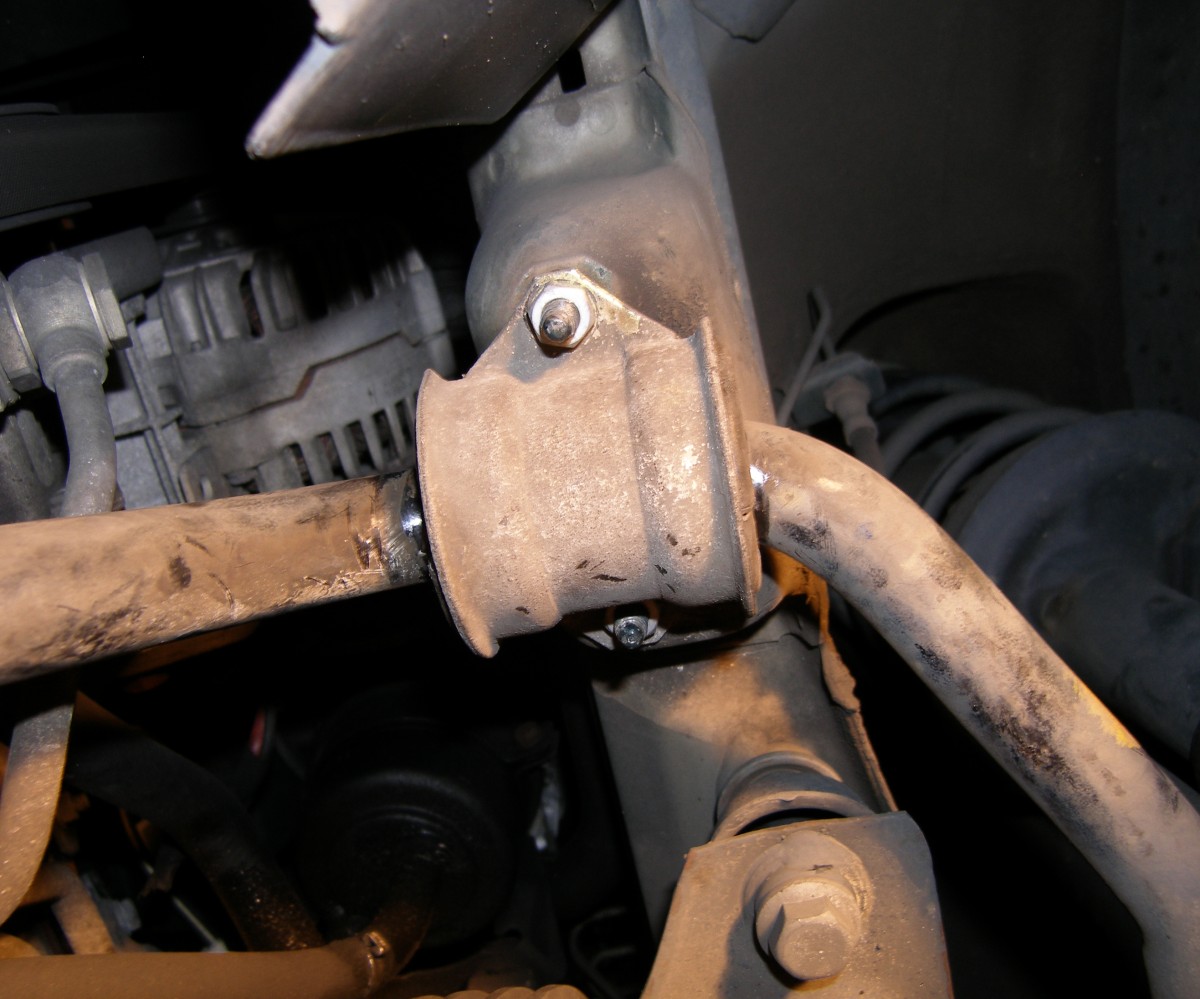
Fig 5: Front Bushing Installed
Front Sway Bar Service Procedures
To “service” a front swaybar, you replace the end links that tie the bar to the suspension, and the bushings that hold the swaybar securely to the frame of the vehicle. We'll start by replacing the end-links.
End Link Service
To remove the end links:
- Jack up the front of the vehicle and put it on jack stands. If you don't know how to properly jack a BMW, STOP RIGHT HERE and educate yourself on correct jacking procedures before you kill yourself. And re-read my site disclaimer while you're at it.
- Remove both wheels, mark them using tape or some other method as left and right and set them aside out of the way. Marking the wheels is particularly important if your vehicle is equipped with directional tires.
- Start on either side and orient yourself to the task at hand. Look just behind and to the rear of the hub, rotor and kingpin assembly. You will see one end of the stabilizer bar connected to the lower control arm (the flat curved metal component with large holes in it).
- Use the special thin 16mm wrench to hold the ball joint backnut steady and a 16mm socket or combination wrench to remove the associated nut. You may find it helpful to use a smaller breaker bar or long-handled ratchet to remove this nut, as it's torqued to 59Nm (44 ft*lbs).
- Using 13mm combination wrenches and/or a socket, remove the bolt that ties the lower bushing of the end link to the U-shaped mounting flange (which is in turn mounted to the control arm), then remove the end link and set it aside. This bolt is torqued a bit less than the ball joint nut, but it may still be tight.
- While not strictly necessary to replace the U-shaped mounting flange, I did for aesthetics and basic sanity (since I have heard of these failing, particularly on cars equipped with larger aftermarket stabilizer bars and lowered suspensions). To remove the mounting flange from the lower control arm I found I needed to use a combination wrench wedged between the “ears” of the flange to prevent it from rotating while I removed the lower 13mm bolt.
To install the new end links:
- Install the new mounting flange. Torque the nut (under the control arm) to 42Nm (31 ft*lbs). The concave surface of the control arm will serve to prevent the flange from rotating when it's near the final torque, but you may again need to use a combination wrench wedged between its “ears” to prevent it from rotating initially.
- Grab the new end link, break the ball joint free and then return it to near the center position. The joint tends to stick since it is tight to begin with, but also because it hasn't moved since it was manufactured. You'll need this joint to move slightly to align it with the bar and it's easier to break it free while the part is in your hand rather than on the car.
- Hold the end link in position in the mounting flange and then the bolt that connects the lower bushing of the end link to the flange. Spin the nut on loosely but don't tighten it down yet. This is just for initial fitting. We'll tighten everything down shortly.
- Using the thin wrench to hold the ball joint back nut, torque the ball joint nut to 59Nm (44 ft*lbs). Make sure that the flats on the back nut are parallel to the strut (near vertical). While the Bentley glosses over this important point, the BMW TIS emphasizes the importance of this step, so I will too. Warning: The torque spec for non-M cars specified in the Bentley manual is incorrect according to the TIS. Follow the 59Nm recommendation for all E36 models.
- Torque the lower bushing of the end link to the mounting flange to 42Nm (31ft*lbs). You will note that the new flange “ears” are slightly Y shaped, but they will pull in as you reach the final torque. This is, incidentally, one of the advantages of using the new part. It's easier to install the end-link with the extra play in the flange. Warning: The TIS does not provide a torque specification for this connection, nor does the Bentley from what I can ascertain. This is a reasonable guess on my part given the size of the bolt and the fact that it uses a self-locking nut.
- The end link is installed. Repeat the process on the other side.
Bushing Service
When I went to find the proper bushings for my vehicle, both realoem.com and the current BMW ETK software showed different options for the sport suspension, but only for the rear bar. The only bushing for the front bar was 24.0 mm. It turns out that BMW imprints each bushing with a inner diameter and a partial part number. While I was under the car for other reasons I found that my bushings were 25.5 mm, so the ETK information was wrong.
To make a long story short, I took the partial part number to my dealer's parts guy and he came up with a number for the 25.5 mm bushings. I ordered those and installed them without difficulty. I point this out simply to demonstrate that the ETK is not infallible and there are what I choose to call “phantom” parts on these cars, which is to say that they are available if entered into ETK manually, but are not shown in the graphical parts diagrams. This is also a lesson to verify you have the right parts before you start work, or you may wind up doing things twice.
Note that you need not replace the bushing brackets unless they have been damaged in some way (and if they have been, you have bigger problems and probably should be taking the car to a professional for evaluation). Based on the gauge of the steel, I imagine the studs would rip out of the frame before the bracket itself would bend. Of course, if you want to buy a new part for painting or other cosmetic enhancement ahead of time, this would be the time to do that.
To remove the old bushings:
- Optionally, using a fine tipped permanent marker, mark the location on the sway bar where the bushings sit. This will be used as an aid during installation of the new bushings and to let you know if the bar has shifted to either side as you reinstall it.
- Loosen each of the four nuts (two on each side) that hold the bushing brackets in place so that they're still grabbing a few threads. Then hold the bar up with one hand while you remove the nuts with the other. This prevents the bar from falling down, though there's little chance of that happening because the brackets tend to stay where they are unless you hang on the bar at this point.
- If the brackets don't come down on their own, use a screwdriver wedged between the frame and the bushing to pull the bracket down on each side. Remember to hold the bar with one hand while you pry with the other, as the bar weighs about as much as you'd expect a 3/4” bar of steel to weigh and it may drop down suddenly. Keep your head out from under the bar to make sure it doesn't put a nice dent in your skull. Set the brackets aside somewhere safe.
- Remove the bushings from the bar. I pulled the bar down about 1/2” and rotated the bushings 180 degrees (so the split was facing upward) and then leveraged gravity to pull them off the bar (pulling down is easier than pushing up). You may also be able to slide the bushings one way or the other and pull them off that way. It's easy, really.
To install the new bushings:
- Install the new bushings on the bar (split facing downward, of course) and align them with the marks you made on the bar. If using the OE rubber bushings, make sure they are applied to the bar DRY. Do NOT apply any grease to them or they will swell and make noise. Grease only belongs on aftermarket poly bushings.
- Clean the inside of the metal bushing brackets in a parts washer or just rub it with some brake cleaner and a scotch-brite pad. Let it dry.
- Optionally apply some Spray 9 to the inside of the bracket to serve as a temporary installation lubricant. The new bushings are slightly oversized relative to the brackets and will be a tight fit. Note that I did not use any lubricant and I was able to get them up far enough to get the nuts started. Whatever you do, do NOT use grease of any kind for this application.
- Install the cleaned bracket over the new bushing and push it and the bar assembly up until you can get the two nuts started. Torque the nuts to 22 ft*lbs.
This completes the procedure to service the front sway bar. Before you do any additional work, make sure you've torqued everything to spec on the front bar and then jack the car down and go for a test drive. I think you'll find your steering a lot tighter and smoother over bumps.
Rear Sway Bar Service Procedures (TBD)
The procedure for the rear bar is similar, but does involve a bit more work and some different techniques because the bar must be removed entirely from the vehicle and the end links must be pressed onto the bar. While I could document the “official” procedure for this task, the purpose of my DIY articles is to communicate my insights into each procedure. As I have not yet serviced the rear sway bar, I cannot yet comment on the procedure. Check back soon.