Introduction
The BMW Roundel, often described as a "stylized, rotating propeller" with the brilliant blue color representing the sky, is one of the most recognized symbols in the world. As a pilot, I guess I've always associated with the history behind the Roundel more than the average owner (BMW has engineered some great aircraft engines and military technology in addition to cars and motorcycles -- no doubt about it), so I take pride in maintaining the symbol of a company with a long and diverse history.
At around eight years of age and after two trips to the body shop my 328's Roundel wasn't looking so hot, so one day I decided to replace it. The task is extremely simple in principle, but does require some delicate work.
Tools and Equipment Required
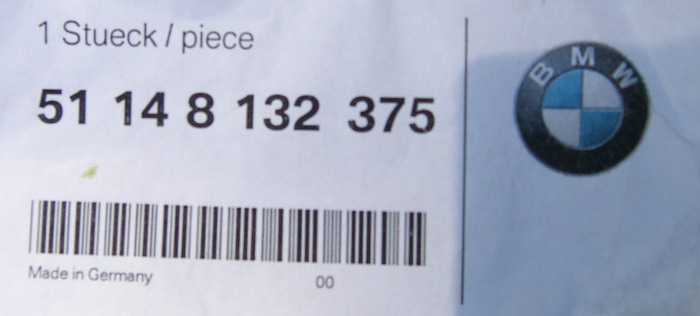
- 1 BMW Roundel (51 14 8 132 375)
- 2 BMW Roundel Mounts (must be ordered separately)
- 1 1" putty knife (clean!)
- 1 Pair Needle-Nose pliers
- Moist cleaning towel
- Some of your favorite wax
- Wax applicator and removal towels
Procedure
Step 1: Overview of the Task
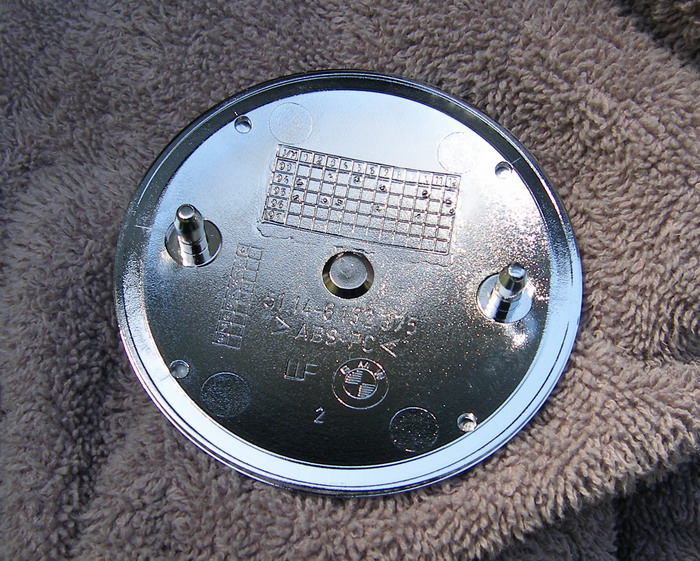
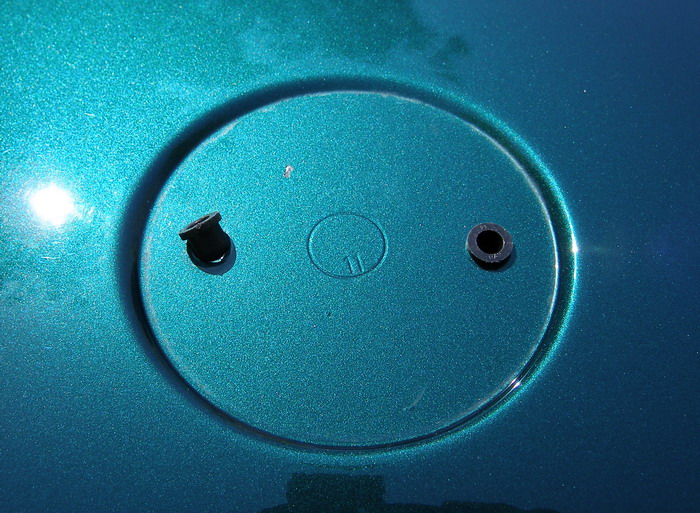
The Roundel is attached to the car via two spikes that are press-fit into grommets that are themselves press-fit into holes in the hood. To remove the Roundel, it must be pried away from the vehicle and out of those holes.
Step 2: Get the right tool for the job
While some online DIY articles suggested the use of a flat-blade screwdriver to conduct the surgical procedure (let's call it a "Roundelectomy"), when I looked at things more closely, I realized it just wasn't the right tool for the job because the shaft was too rigid. I simply couldn't get it in the proper position without marring the finish. And when I tried to wrap the tip in some kind of fabric as others had suggested to protect the finish, I found the assembly too large to fit in the small gap between the Roundel and the hood.
I quickly concluded I needed something flat and thin, so I went back to my tool collection and managed to find the perfect tool for the job -- a brand new 1" putty knife. Clean, thin and flexible enough to work its way under the emblem without causing any damage.
Step 3: Roundelectomy

The actual procedure for removing the Roundel is simple, if not a bit crude. Position the putty knife at the 1:30 position, bend the knife sufficiently to prevent the face of the blade from contacting the hood, and push the edge of the knife into the very small gap that exists between the hood and the emblem.
Done properly, the knife will never touch the rim of the recess. Note that I only have two hands and one was holding the camera, so the picture above does not show the bending technique I used, but you can clearly see that if you don't bend it in the middle to follow the arc of the recess, one side or the other will dig into the paint.
Once you pry one side of the Roundel up, slide the knife to the 10:30 position and pull upward. Repeat at each location until the emblem pops off its mounts.
Again using the putty knife as a pry-bar, pull up on the mounting grommets. If they don't come all the way out, use some needle-nose pliers to finish the job. Incidentally, you shouldn't worry about damaging these grommets as you should have two new ones at the ready. They don't ship with the Roundel itself, but most parts departments keep them in stock.
Step 4: Clean & Wax
The area under your Roundel has likely never seen the light of day, though it is routinely exposed to the elements -- dirt and salt among them. This means some cleaning and waxing is in order.
Because my hood had been freshly painted, I found the area pretty clean, but I still used a moist towel to clean the area of some residual polishing compound before applying two coats of synthetic sealant wax and a top-coat of carnauba wax just to be on the safe side.
Step 5: Install the New Roundel

After you're done cleaning up the paint, it's time to install the new Roundel. Simply press-fit the new grommets in place and then center the spikes of the Roundel over the grommets before firmly pushing down on the face of the Roundel with your thumbs positioned directly over the spikes. Note that you may need to wiggle the part at the 12 and 6 o'clock positions to get the spikes to sit properly, but it will happen pretty quickly.