1. Parts you'll need:
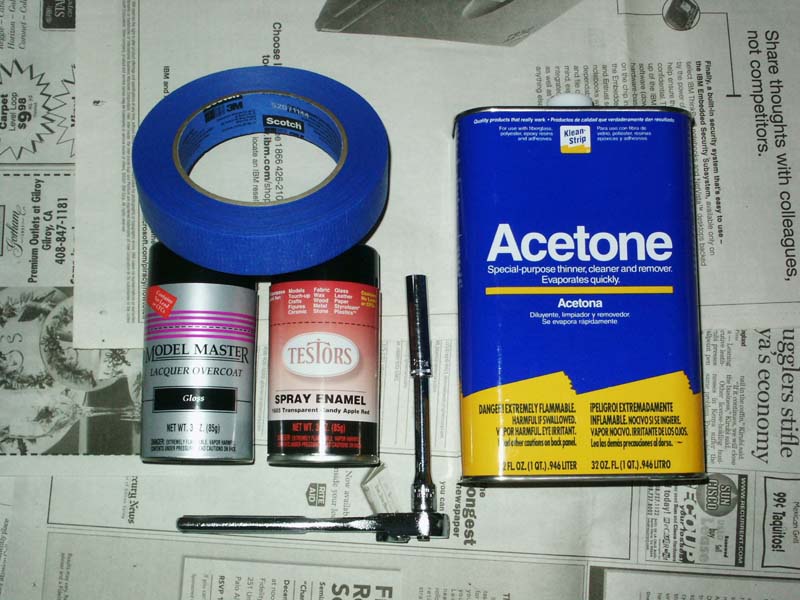
- #1605 Testors Transparent Candy Apple Red Spray Enamel
- #1961 Model Master (Testor) Clear Gloss Finish Lacquer Overcoat Spray
- Scotch/3M #2090 Blue Safe-Release Painters' Masking Tape (1 in x 60 yd)
- Acetone
- 8mm deep socket
Supplies Notes:
- My mentor Matt used #1629 Testors (Ruby) Red Metal Flake Spray Enamel and judging by his pictures, it turned out just as good. All the hobby shops in my area were out-of-stock, and I had a few insist that everyone painting tail-lights used #1605. It made some sense since a transparent enamel might allow more light to pass thru than a Metal Flake enamel. I would have probably been fine using either.
- The #1961 Model Master Clear Overcoat seems very similar to #1261 Testors Glosscote and are probably interchangeable as well.
- Don't skimp on the masking tape since standard masking tape might leave a residue. Get the Scotch stuff or an equivalent.
- I was pretty careful during painting and therefore didn't require the Acetone for paint removal.
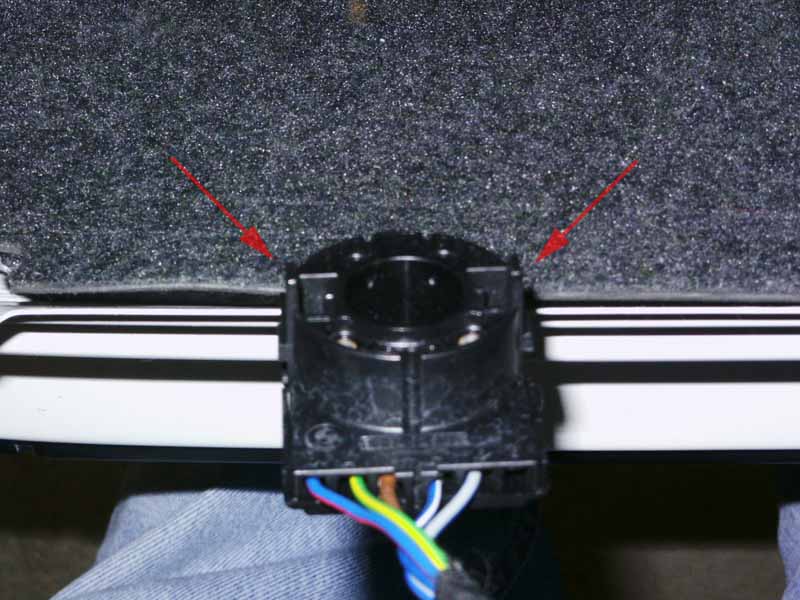
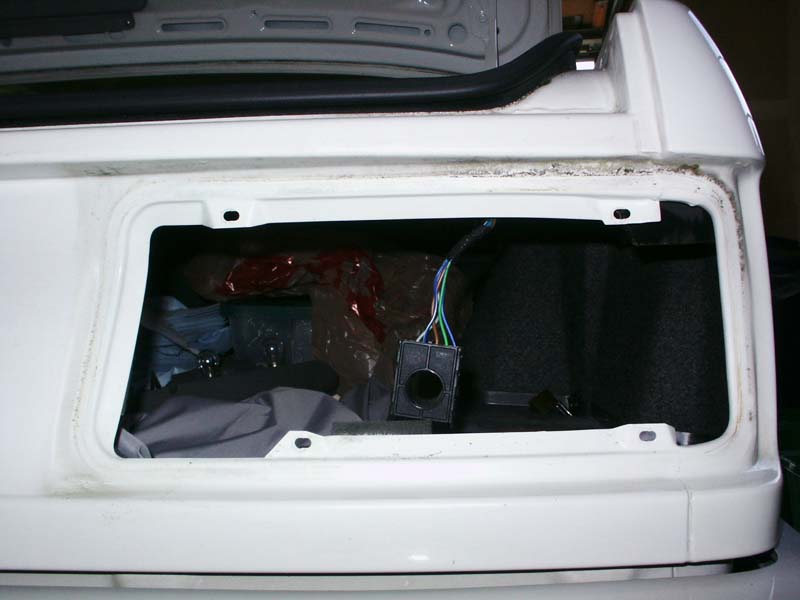
2. Unscrew the bulb panel on the backside of the tail-light and unclip the wiring harness by pressing the two tabs inwards while pulling (see pic). From the back, remove (6) 8mm nuts that hold the tail-light assembly in place. Slide off the side mounting bracket and carefully remove the tail-light by pulling straight out.
3. Clean the tail-light with soap and water. Dry the lens thoroughly. Carefully mask off the areas not being painted. The divider between the amber and red portions had a plastic mold line between them, so I followed that line with the masking tape and newspaper
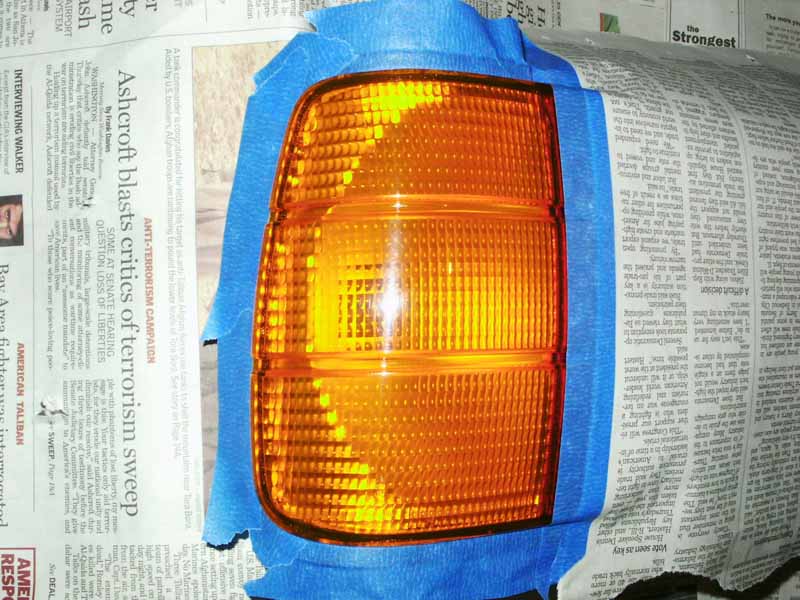
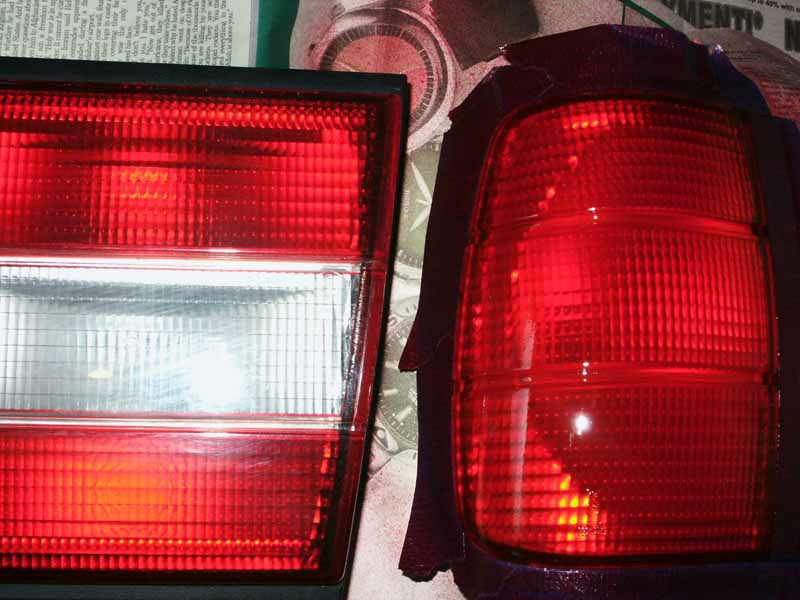
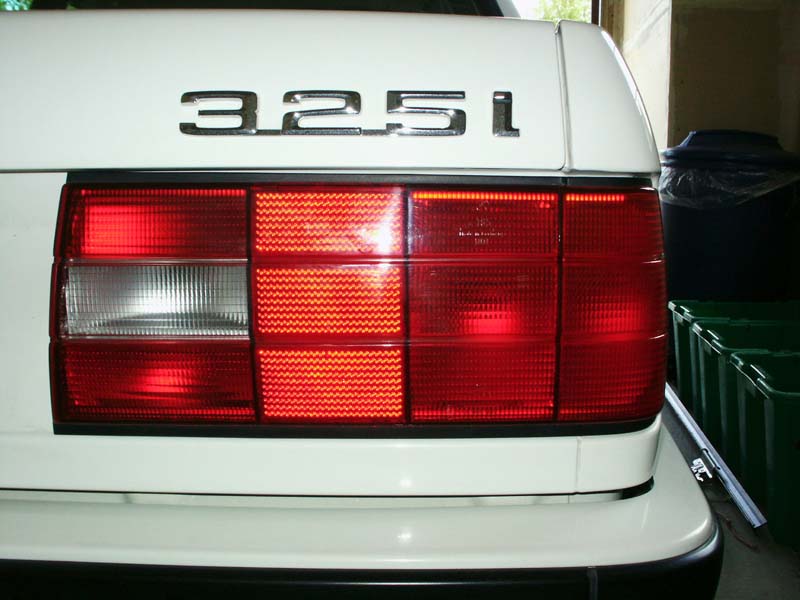
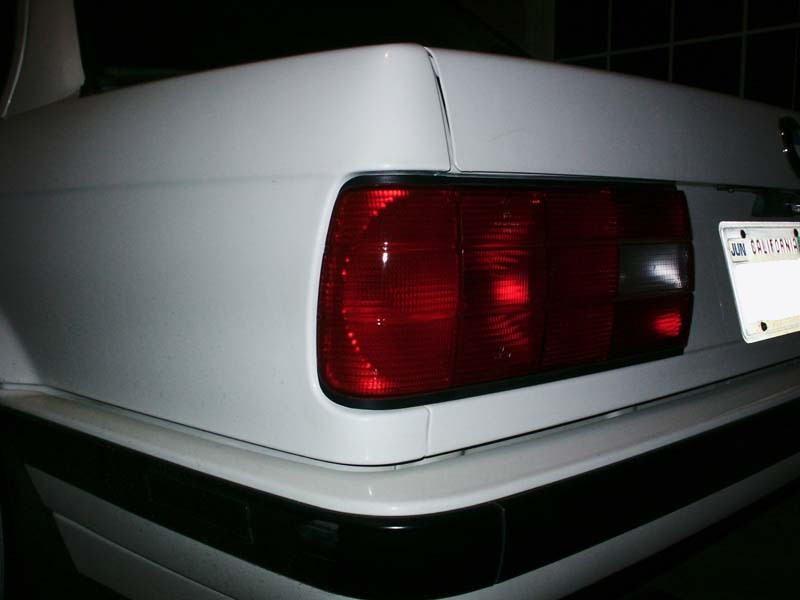
4. Prepare the spray paint as per the directions and proceed to paint the exposed amber portion using light, even strokes with the nozzle held 6" to 8" from the lens. The can recommends 10" to 12", but I found it easier to work a bit closer. If you encounter any issues, use the acetone to remove the paint. I used approximately 6 passes for the front of the lens and 3 smaller passes for the exposed edges. Avoid overspraying since the excess paint will cause runs and drips. Wait approximately one hour and apply a 2nd coat if necessary to match color. Check to be sure the entire amber area is coated. Once you are satisfied that the color is closely matched, allow the last coat to dry, then apply a coat of Clear Lacquer to protect the finish and add some shine. I ended-up applying two coats of red and one coat of clear. You can see via the picture below that the color match is fairly good, and it gets slightly better after curing is complete.
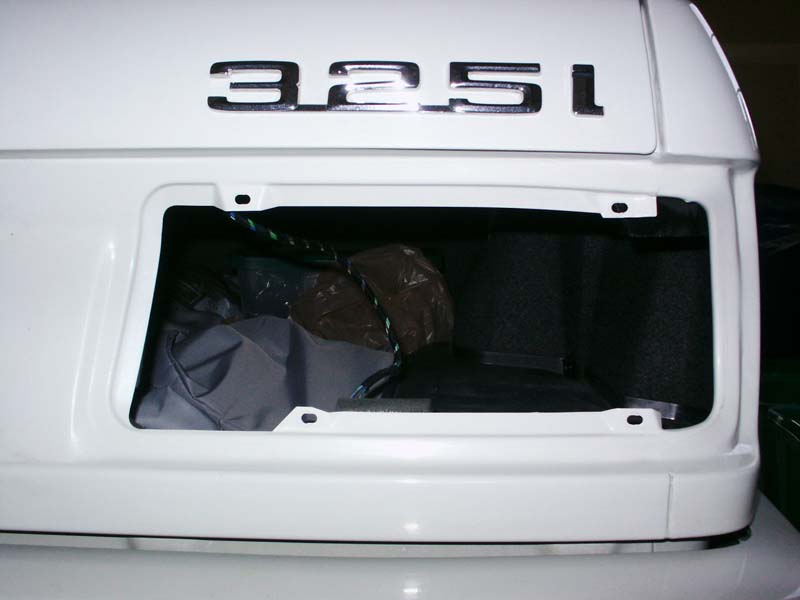
5. While waiting for the last coat to dry, it's a good idea to clean the tail-light mounting area and rubber gaskets.
Before
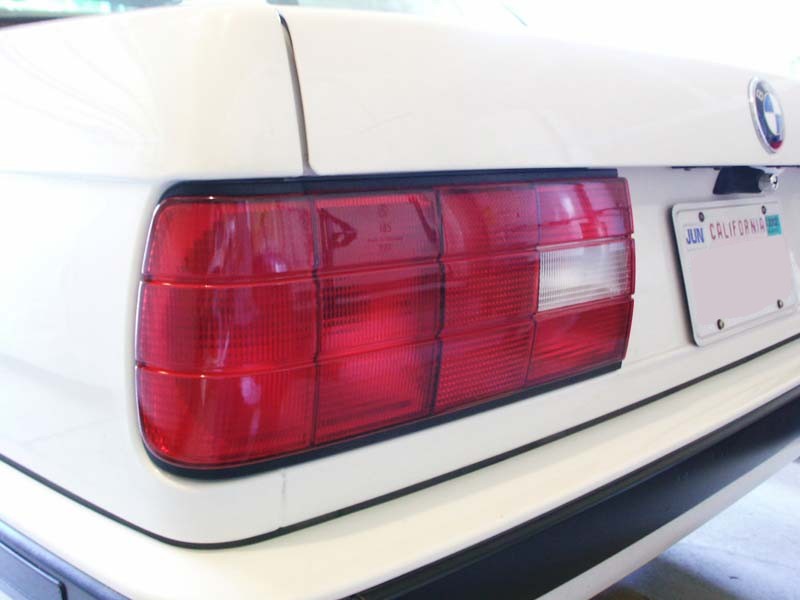
After
6. Once the paint is dry, remove the masking tape and check for flaws. Insert the gaskets into the lights, reinstall the assemblies, and enjoy the cheap mod! See the sections linked below for better comparison pictures.
RESULTS
I was looking into buying OEM all-red tail-lights, but didn't feel like spending $200-$300. This mod resulted in a near perfect replica for under $15 in supplies. At any distance over two feet, it looks stock. Up close, it's possible to tell there's a difference, but it's so minimal that I don't care. 99.9% of the population will never notice that it used to be amber and has been modified. After adding the 2nd coat of red, it did dull the prismatic reflective rectangles on the lens, but the Gloss Coat compensated a bit. Again, see the comparison shots to determine if you can live with it or not.
Overall, I'd rate the finished product a 9.5/10 when viewing from any normal distance, and an 8/10 if someone is super-critical and viewing up close. I'm ecstatic with the results and find myself looking only at the tail-lights when approaching my car, thinking "I should have done this a long time ago...".